By Doug Jimerson
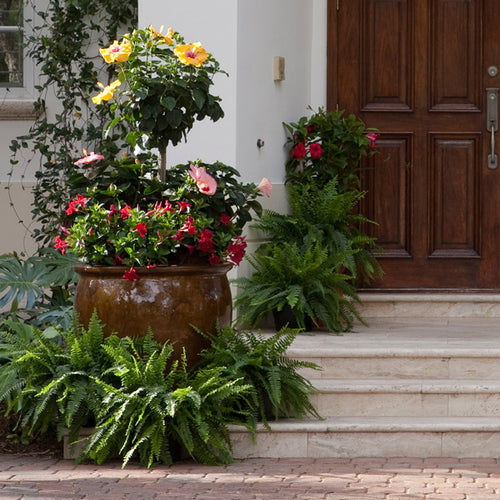
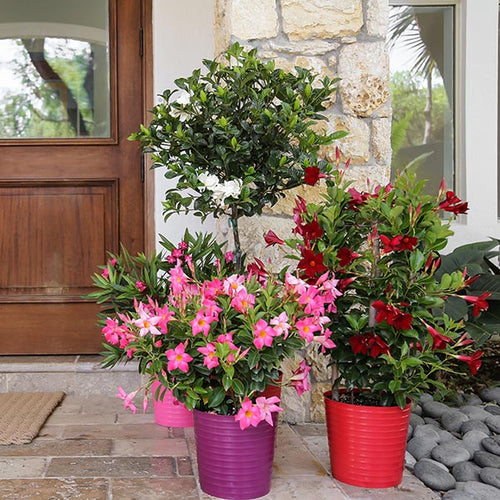
This summer, take your garden to new heights: Plant a container garden. Container gardens bursting with colorful flowers, vegetables, or herbs are ideal for porches, decks, patios, and front entries. Window boxes are wonderful ways to decorate windows. And hanging baskets add color to overhangs, arbors, or on stands by themselves. You can buy ready-made containers at your local mass merchant garden center or you can customize your own creations. Here’s how easy it is to plant a container garden.
Estimated Time
20 minutes
Materials
Container
Soil
Plants
Fertilizer
Step 1: Select Your Container
Choose a container that matches your style. For the most part, your plants don’t care if the container is plastic, terra cotta, or another material. Be aware, though, that porous materials such as terra cotta will dry out a little faster.
Note: Hanging baskets come in two basic types: plastic and moss. Plastic baskets, which generally come in white, black or green, are easy to plant and care for. Keep in mind that once your plants mature you won’t see much of the basket so the color and material will matter little. Moss baskets consist of a wire frame with a moss or coir (coconut hull) lining. They look more natural than plastic, and you can often plant them on all sides to create a ball of bloom. Moss baskets have a tendency to dry out quickly and need a bit more attention to keep them looking good. So, if you occasionally forget to water, choose plastic.

Step 2: Look for Drainage Holes
Good drainage is essential for all container plantings. No matter what type of material you’re working with, make sure it has drainage holes in the bottom.
Note: Quality plastic baskets also have a drip tray attached to prevent water from spilling down on your head when you water. Moss and coir are permeable so drainage isn’t a problem.

Step 3: Buy Potting Soil
Choose a good-quality commercial potting soil to plant your container garden in. Never use soil directly from your garden because it will harden into a concrete-like ball when dry and can introduce insect or disease pests. The best potting soil should have equal amounts of peat moss, pine bark, perlite, or vermiculite. Some potting mixes also contain granules of dry, slow-release fertilizer, which is an added bonus.

Step 4: Plant Your Container Garden
Add potting soil until it’s an inch or two below the rim of your container. Use your hands to press the soil into place and remove air pockets. Then, use your fingers or a small trowel to make planting holes large enough to accommodate your plants. Place the tallest plant in the center of the container. This is called your “thriller” plant. Then, surround it with bushy, medium-size “filler” plants. And, finally tuck in some trailing or “spiller” plants around the edge of the container where they can cascade over the edge. After all the plants are in place, sprinkle a little additional soil between them so that all the roots are completely covered.

Step 5: Feed Your Plants
If your potting soil doesn’t contain fertilizer, sprinkle some granular, slow-release fertilizer at planting time. Scatter it over the top of the soil as if you were adding pepper to a salad. Every time it rains (or when you water), some of the fertilizer will leach into the soil and feed your plants automatically.

Step 6: Just Add Water
Once you’ve planted your container, water it thoroughly. Use a watering can or gentle mist from your garden hose until you see water running out of the drainage holes on the bottom of the container. This will hydrate your plants and firm the soil around the roots.

Step 7: Container-Garden Care Tips
Place your container garden where it gets the appropriate amount of light (sun-loving plants need a spot that gets 6 to 8 hours of direct sun a day, while shade dwellers can get by on less). If you’re working with a hanging basket, make sure the basket is well secured because wet soil is heavy and the last thing you want is a wet basket crashing to the ground. If possible, hang your basket where it won’t be buffeted by drying winds. Water daily during hot weather and remove dead flowers as they appear to keep your container garden in top form.

Love hanging baskets? See our Hanging Baskets Ideas!
Learn more with our Container Gardening Guide.
Container Gardening Questions?
We love to talk to other gardeners. Email us your questions and we'll have one of our experts get back to you!
This summer, take your garden to new heights: Plant a container garden. Container gardens bursting with colorful flowers, vegetables, or herbs are ideal for porches, decks, patios, and front entries. Window boxes are wonderful ways to decorate windows. And hanging baskets add color to overhangs, arbors, or on stands by themselves. You can buy ready-made containers at your local mass merchant garden center or you can customize your own creations. Here’s how easy it is to plant a container garden.
Estimated Time
20 minutes
Materials
Container
Soil
Plants
Fertilizer
Step 1: Select Your Container
Choose a container that matches your style. For the most part, your plants don’t care if the container is plastic, terra cotta, or another material. Be aware, though, that porous materials such as terra cotta will dry out a little faster.
Note: Hanging baskets come in two basic types: plastic and moss. Plastic baskets, which generally come in white, black or green, are easy to plant and care for. Keep in mind that once your plants mature you won’t see much of the basket so the color and material will matter little. Moss baskets consist of a wire frame with a moss or coir (coconut hull) lining. They look more natural than plastic, and you can often plant them on all sides to create a ball of bloom. Moss baskets have a tendency to dry out quickly and need a bit more attention to keep them looking good. So, if you occasionally forget to water, choose plastic.

Step 2: Look for Drainage Holes
Good drainage is essential for all container plantings. No matter what type of material you’re working with, make sure it has drainage holes in the bottom.
Note: Quality plastic baskets also have a drip tray attached to prevent water from spilling down on your head when you water. Moss and coir are permeable so drainage isn’t a problem.

Step 3: Buy Potting Soil
Choose a good-quality commercial potting soil to plant your container garden in. Never use soil directly from your garden because it will harden into a concrete-like ball when dry and can introduce insect or disease pests. The best potting soil should have equal amounts of peat moss, pine bark, perlite, or vermiculite. Some potting mixes also contain granules of dry, slow-release fertilizer, which is an added bonus.

Step 4: Plant Your Container Garden
Add potting soil until it’s an inch or two below the rim of your container. Use your hands to press the soil into place and remove air pockets. Then, use your fingers or a small trowel to make planting holes large enough to accommodate your plants. Place the tallest plant in the center of the container. This is called your “thriller” plant. Then, surround it with bushy, medium-size “filler” plants. And, finally tuck in some trailing or “spiller” plants around the edge of the container where they can cascade over the edge. After all the plants are in place, sprinkle a little additional soil between them so that all the roots are completely covered.

Step 5: Feed Your Plants
If your potting soil doesn’t contain fertilizer, sprinkle some granular, slow-release fertilizer at planting time. Scatter it over the top of the soil as if you were adding pepper to a salad. Every time it rains (or when you water), some of the fertilizer will leach into the soil and feed your plants automatically.

Step 6: Just Add Water
Once you’ve planted your container, water it thoroughly. Use a watering can or gentle mist from your garden hose until you see water running out of the drainage holes on the bottom of the container. This will hydrate your plants and firm the soil around the roots.

Step 7: Container-Garden Care Tips
Place your container garden where it gets the appropriate amount of light (sun-loving plants need a spot that gets 6 to 8 hours of direct sun a day, while shade dwellers can get by on less). If you’re working with a hanging basket, make sure the basket is well secured because wet soil is heavy and the last thing you want is a wet basket crashing to the ground. If possible, hang your basket where it won’t be buffeted by drying winds. Water daily during hot weather and remove dead flowers as they appear to keep your container garden in top form.

Love hanging baskets? See our Hanging Baskets Ideas!
Learn more with our Container Gardening Guide.
Container Gardening Questions?
We love to talk to other gardeners. Email us your questions and we'll have one of our experts get back to you!


